

Google and local search
How to claim your business on Apple Maps
Apple Maps comes built into every iPhone. Apple Business is Apple’s free tool for managing your place card there. It replaced Apple Business Connect in April 2026, and existing Business Connect accounts moved over automatically.
The whole process, at a glance
- Sign up1 of 3
- Add your location2 of 3
- Verify and share access3 of 3
Before you start
The first administrator signs up with their real first and last name, a work email and a work phone. Apple sends a code to each. Have the legal business name, address, phone number and website ready. You’ll also need two ways to prove the business is yours, such as an EIN or D-U-N-S number, a DNS record on your website’s domain, or a business license, utility bill or lease. Allow email from apple.com so review messages don’t land in spam.
Follow these steps
Create your Apple Business account
Go to business.apple.com and select Get started. Sign in instead if you used Business Connect before. Enter the legal business name, business email, website and address, then select Next. Leave the agency checkbox off, since that is for agencies registering themselves. If Apple says an Apple Account already exists for that email, sign in with it or use another work email. On the next screen, create the administrator login with your name, a password and a phone number.
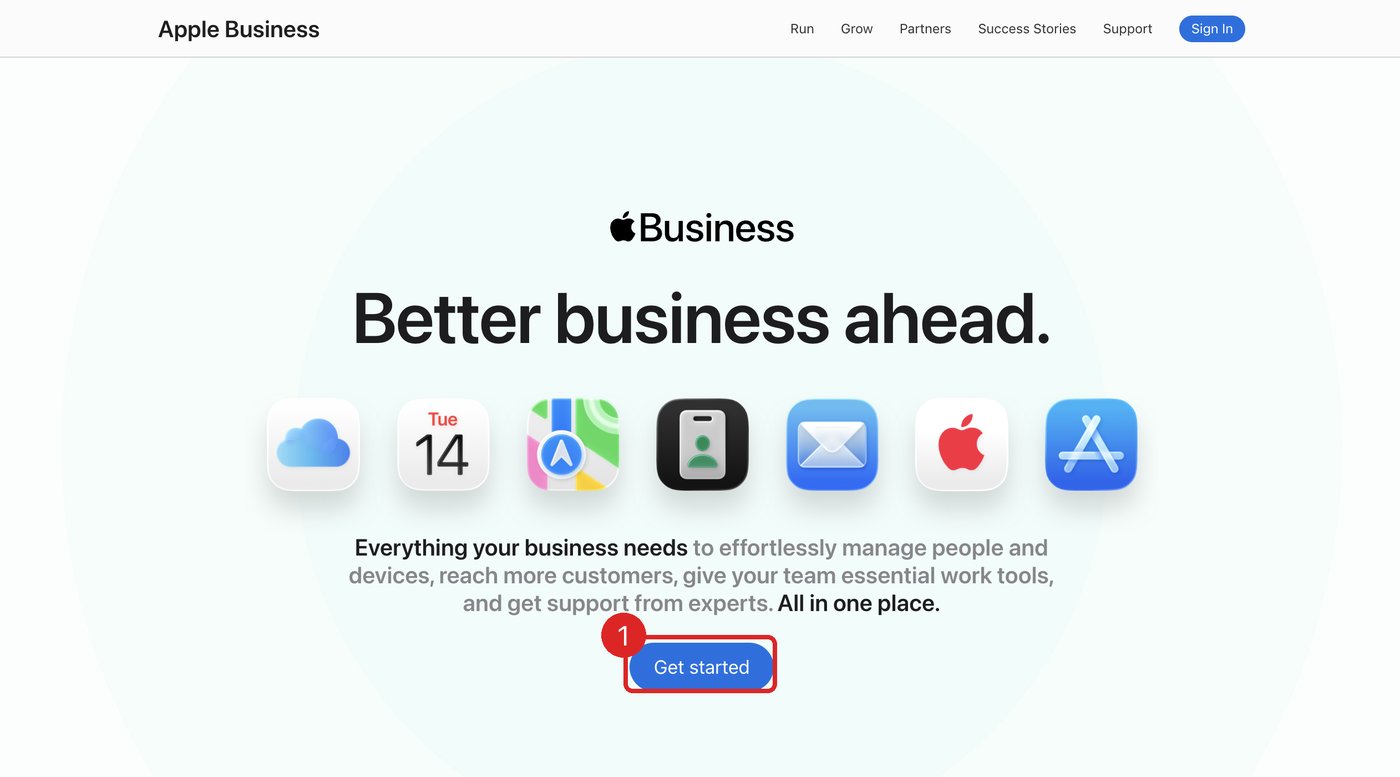
Captured November 6, 2026 in a signed-out browser, before any account was created. The business details are examples. Select the image to enlarge. 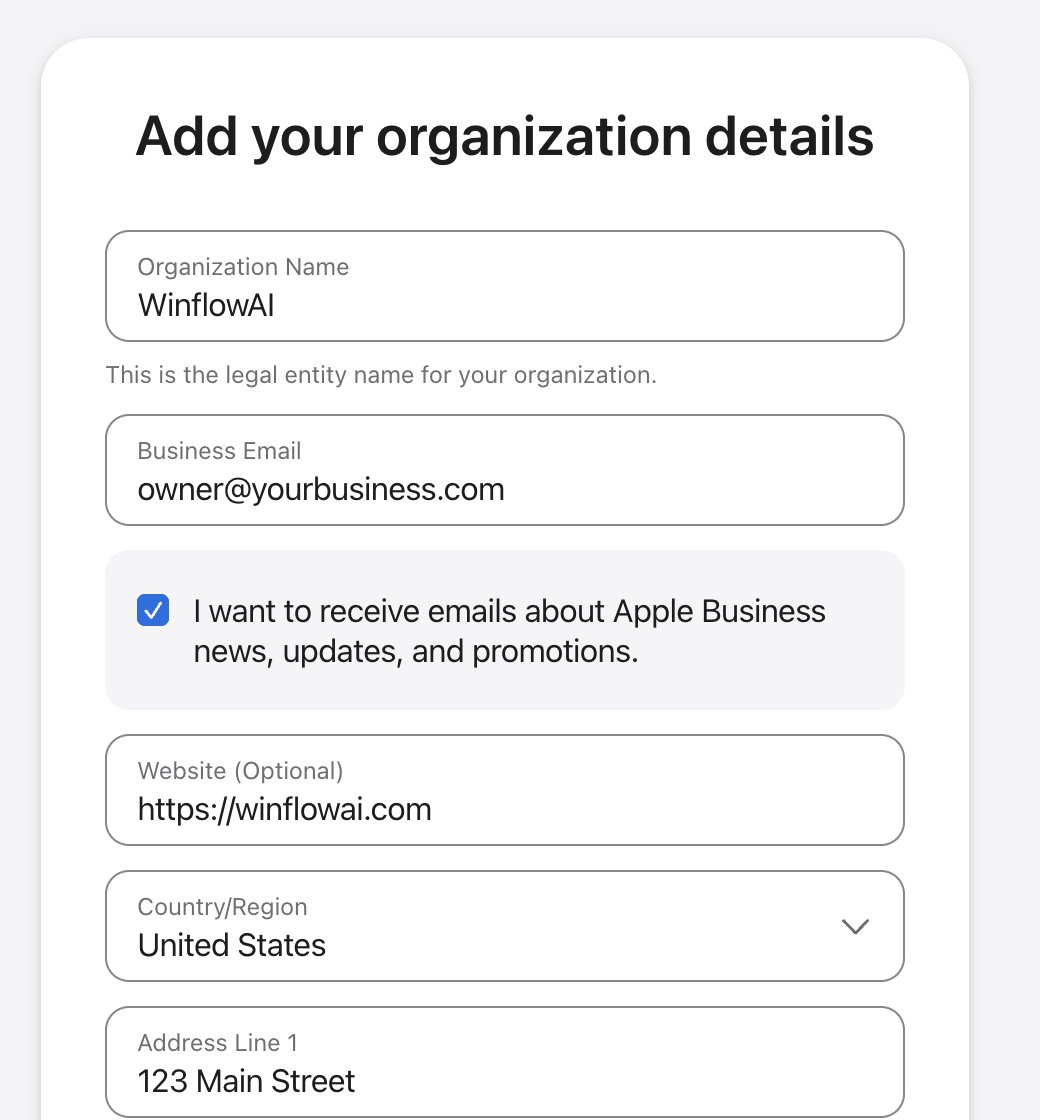
Captured November 6, 2026 in a signed-out browser, before any account was created. The business details are examples. Select the image to enlarge. 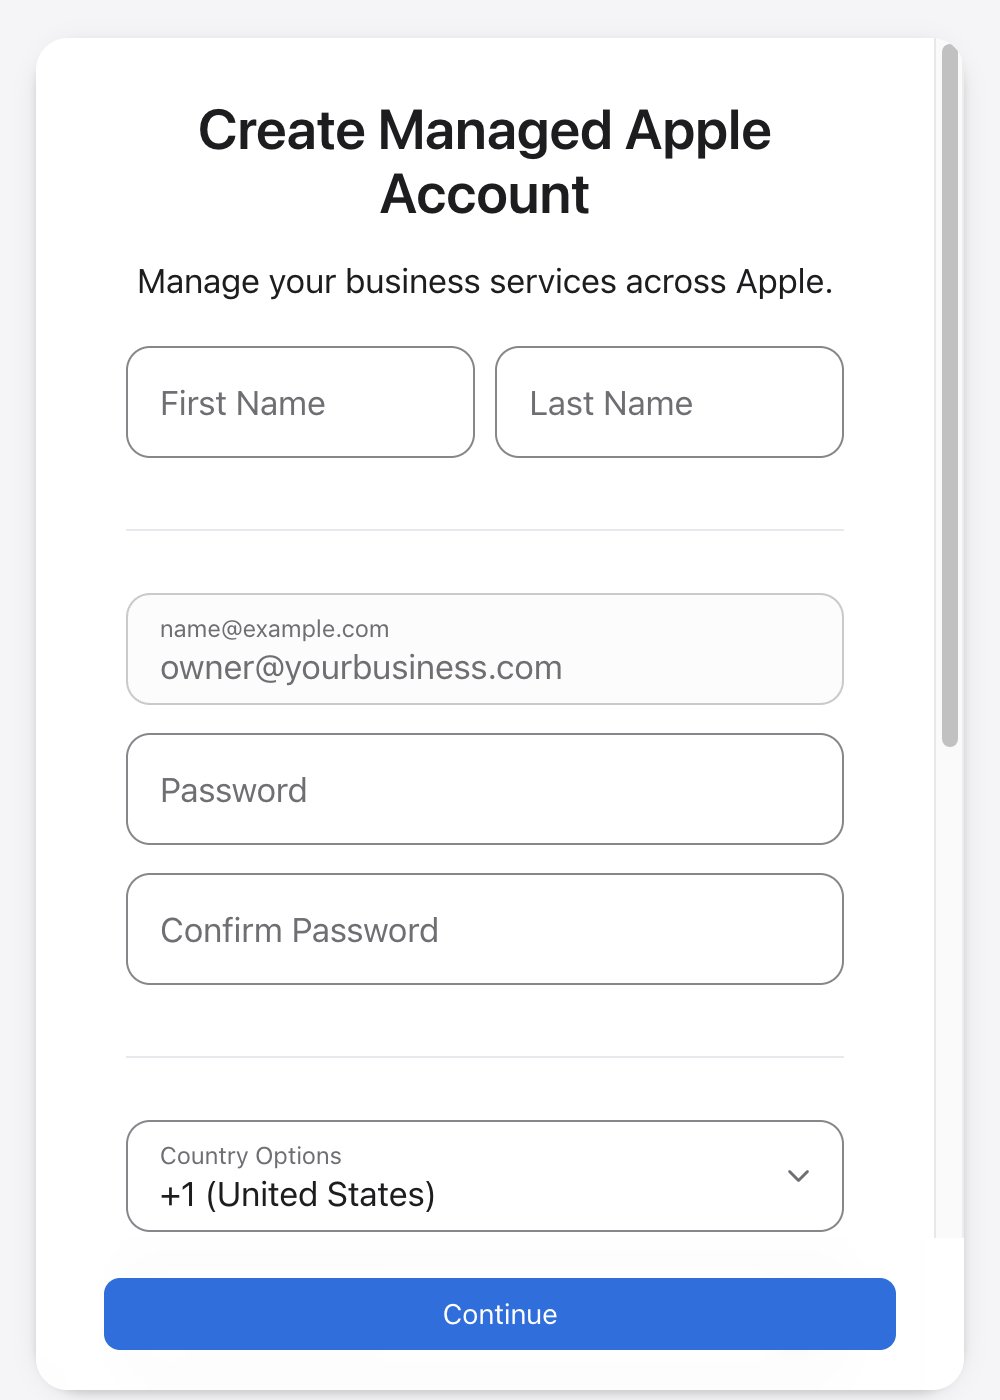
Captured November 6, 2026 in a signed-out browser, before any account was created. The business details are examples. Select the image to enlarge. Add your location
Choose Brands → Locations, then Add Location, Add single location and Next. Type your business name. If Apple Maps already has it, select locate and choose it. If not, select Add a new location with this name.
Place the pin and enter the details
Drag the map until the marker sits over your building, then select Next. Use Map Mode to switch to satellite view if that helps. Enter the display name, primary category, status, phone number and website. Set your hours, choose or create a brand, and select Next.
Verify the business
Check whether Apple offers a phone call for your location. If it does, select Location Verification, Next, then Phone Verification, and enter the four-digit code from the call. Otherwise open Settings → Organization, select Verify Now, choose two methods and select Send for Review. Review takes up to five business days. Apple deletes organizations that stay unverified for 60 days.
Complete your place card
Add hours, photos, a logo and categories: one primary category plus up to 19 more. After verification you can add action buttons, such as reservation or order links, and Showcases for offers or news.
Share access with your agency
Ask your agency for its Apple Business Organization ID. Open Settings → Integrations → Partner Access and select Share Access. Enter the ID, choose what the agency can manage, then select Invite. Your organization must be verified first.
You’re finished when…
Your organization shows as verified, your location appears under Brands → Locations, and Apple Maps shows the correct name, pin, hours and phone number.
If you get stuck
Someone else manages my location
Add the location anyway. Find it under Brands → Locations and select Request Transfer under Status. Explain why, attach a business license or utility bill, and select Send for Review. Review takes up to five business days.
I work from home
Apple accepts businesses without a storefront, but the help pages we checked don’t explain how to hide a home address. Contact Apple Business support before you publish a home address.
I used Apple Business Connect before
Your claimed locations, place cards and photos moved to Apple Business automatically. Sign in at business.apple.com with the same Apple Account.
Is it free?
Yes. The core service is free. Apple sells Maps ads separately in the US and Canada, and you don’t need them to manage your place card.
Official sources and further reading
- Apple: add a single location
- Apple: sign up and verify your organization
- Apple: Business Connect is now Apple Business
- Apple: share access with a partner
- Apple: configure location attributes
- Apple Newsroom: introducing Apple Business
Reviewed November 6, 2026. Platform menus can vary by account and change over time. Examples and checklists are WinflowAI’s own guidance; follow the linked vendor instructions for your account.
Useful next guides

Need help with your website or inquiry workflow? See how WinflowAI can help.