Website care
How to test your website’s contact form
A “thank you” message is only the first checkpoint. Follow one test inquiry all the way from the visitor’s screen to the person who should reply.
The whole process, at a glance
- Submit as a visitor1 of 3
- Find the saved inquiry2 of 3
- Check who follows up3 of 3
Before you start
Tell the team you are testing. Use an email address you control and a clear test label. Check whether submitting the form starts a booking, payment, text message, or other action before sending it.
A practical example
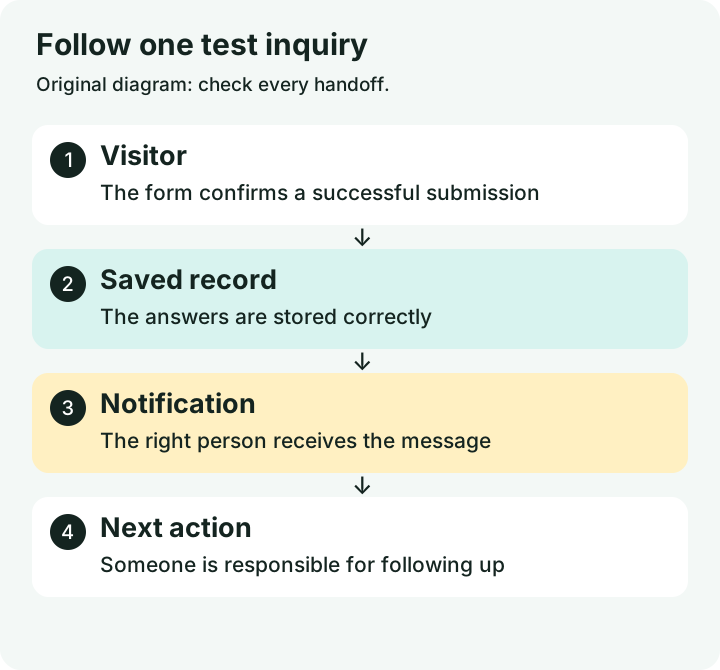
| Checkpoint | Write down what actually happened |
|---|---|
| Visitor screen | Clear success or useful error |
| Saved entry | Matching test label and complete fields |
| Staff notification | Correct inbox and usable reply address |
| Customer confirmation | Arrives if promised |
| Follow-up | Assigned owner and next action |
Follow these steps
Start on the public website
Use a desktop browser and then a real phone. Open the normal contact link from the menu. Check field labels, required fields, dropdowns, upload limits, and the submit button. Try moving through the form with the Tab key. The mobile keyboard should not hide the next action.
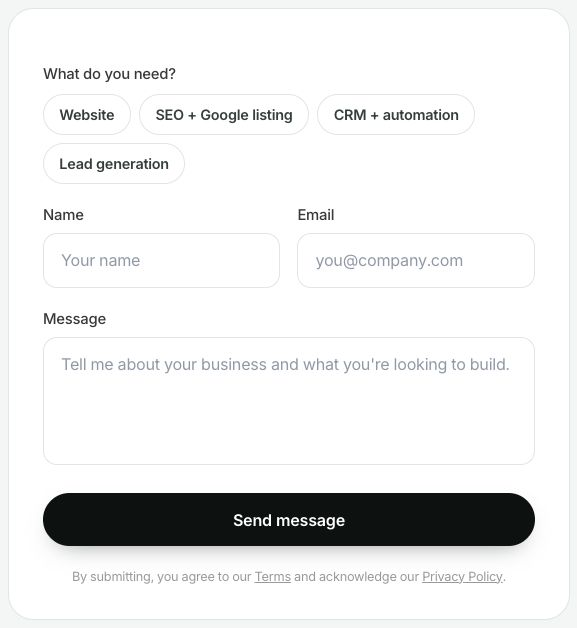
Screenshot of WinflowAI’s own form in the local website preview, September 6, 2026. Start by checking these visible fields and the submit button. This capture does not demonstrate submission, storage, or email delivery. Select the image to enlarge. 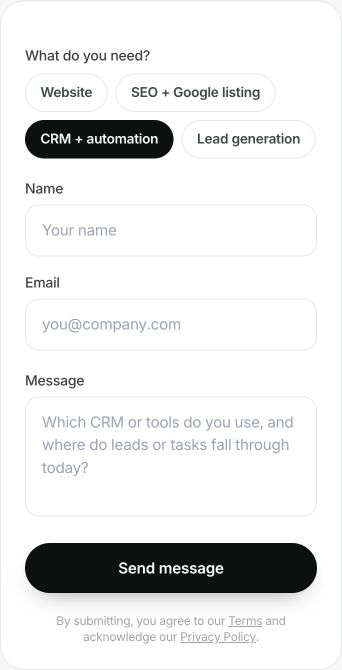
Check the same form at phone width: choices, field labels, message box, and submit button should all fit. This is WinflowAI’s local preview at 390 pixels wide. Select the image to enlarge. Check mistakes before a valid submission
Leave one required field blank and try an invalid email. You should get a useful error without losing your other answers. Then send a valid test, such as “TEST FORM 01, please ignore.” Use your own address for this actual test so you can receive the reply. Note the time, page URL, and device.
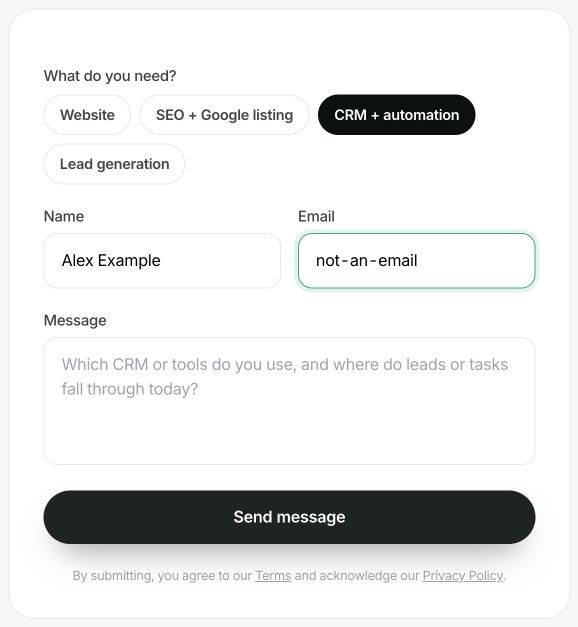
Example of a deliberately invalid test input. This local form kept focus on Email and blocked submission. The screenshot shows the test values; browser error messages can look different. Select the image to enlarge. Find the saved record
If your form system stores entries, find the matching entry in its dashboard. Check name, email, phone, service, message, and attachments. A notification email alone is not a backup record. If entries are not stored, document that limitation and agree where inquiries will be retained.
Check both notification paths
Confirm the staff email arrives in the intended inbox, including spam or quarantine checks. Use Reply and verify that it targets the visitor when that is the intended behavior. If the form promises a customer confirmation, check that inbox too. An on-screen success message does not prove either email was delivered.
Follow the inquiry into the next step
If a CRM, booking tool, or automation is connected, find the matching record and check its owner and next action. Repeat for materially different forms or routing choices. Stop if a wrong recipient receives data. After fixing a problem, submit a fresh labeled test and recheck the entire path.
You’re finished when…
Both phone and desktop submissions reach their intended destination, the data is readable, and a responsible person knows the next action.
If you get stuck
The page says success but no email arrived
First look for the saved entry. Then check the recipient address, spam filtering, form notification settings, and the sending service’s delivery log. Send the developer the test time and URL.
Two entries appeared
Record whether you clicked twice, refreshed, or retried after a slow response. Ask the developer to check duplicate handling before deleting the evidence.
We use several forms
Test each distinct form and each branch that changes where the inquiry goes. One working homepage form does not prove a quote-request form works.
Official sources and further reading
Reviewed September 6, 2026. Platform menus can vary by account and change over time. Examples and checklists are WinflowAI’s own guidance; follow the linked vendor instructions for your account.